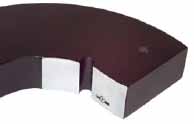
Air Rings and Air Forks
 requires extreme care. Air gages handle 50 millionths with ease, and some will measure to a resolution of 5 millionths. When most people think of air gaging, they think of plugs. But a number of air ring and air fork styles provide the same benefits and some additional ones as well. An air ring is the opposite of an air plug, and is primarily used to measure ODs. Air rings look quite simple—a steel ring with a pair of jets at a particular location—but there is a lot of engineering built into them.
 One trick is in calculating the size of the ring in order to achieve a good balance of clearance between the part and the opening in the ring. Too much clearance and your readout will start showing centralizing error. This happens when the part is shifted slightly in the tool and the air ring measures a chord rather than the diameter. Too little clearance and the indicator's range gets limited—or even worse—a geometry error can prevent the operator from inserting the part into the air tool. To read the remainder of this article "click here"
Air Snaps Improve Shop Floor Measurement Performance
Mechanical snap gages have been the gage of choice for measuring OD's as parts are being machined. They are an easy to use, fast and reliable method to check the OD of the part while in the machine. But today the tolerances on many OD’s are shrinking. What was once 0.002” is now 0.001” or even 0.0005” on diameters 4” or larger.
Once these tolerances are specified the mechanical snap starts to meet it limits. Because of the mechanical limits and resolutions of the readouts they just don’t have the capabilities to meet GR&R performance required. This is where the Air Snap takes this measurement process to a new level.
Because the air snap is made to the size to be measured with no moving parts, the design is far superior for the
 application. Special configurations allow for placing the jets close to shoulders or multiple measurements in a single gage. A combination of high performance and versatility make an Air Snap the gage that will improve your measurement process.
 To download more information about Air Snaps "click here".
No comments:
Post a Comment