To purchase Mahr Products
Contact
For full line of Mahr products check
Micrometers -
Measuring under the influence:
The basic micrometer is one of the most popular and versatile precision hand-held measuring tools on the shop floor. While the most common type is the outside diameter style, the principle can be used for inside diameters, depths and grooves. With so many options for holding the spindle and alternate contact points available, it's a tool to satisfy an endless number of measurement applications.
The biggest problem with micrometers is that measurements are subject to variations from one operator to another. There are two types of influences that contribute to this variation: "feel" or inconsistent gaging force, and subjective factors.
The micrometer is a contact instrument. Sufficient torque must be applied to the micrometer to make good positive contact between the part and the instrument. The only torque calibration in the human hand is the operator's "feel." What feels like solid contact to one operator may not feel correct to another, so the readings will be different. In order to eliminate the "feel" part of the measurement, the designers of micrometers incorporated a ratchet or friction thimble mechanism. This is an attempt to assure more consistent contact pressure and eliminate the human influence.
A psychologist might say that the other types of measuring influences, the subjective ones, are all in the operators' heads. Tell an inspector that the best machinist in the plant made this part and influence enters the picture. Or suppose your boss walks over and asks you to measure a part and he adds, "I just made it myself." In these cases, measurements will tend to be better than the part deserves.
There are also more subtle types of influences. For example, if you know what size the parts ought to be before you measure them, readings will tend to be closer to that ideal than if the target dimension were unknown.
Don't take my word on this, conduct your own experiment.
Step 1: Take a number of workpieces and have several people measure them using micrometers without a clutch or ratchet or friction type thimble. Don't reveal the actual dimension of the workpiece or what anyone else got for readings. These are uninfluenced measurements.
Step 2: Give the same operators a known test piece to practice on to get a feel for obtaining a repeatable reading. Then ask them to measure an unknown part. Next give another group a sample known part to practice on to get a feel for obtaining a repeatable reading; then have them measure parts where the size is known. These are influenced measurements and I'm willing to bet good money that there will be significantly less variation in these results. It's just human nature.
Step 3: Replace the micrometer with one with a ratchet or friction thimble. The measurements are likely to improve even more.
Now that you have a better understanding of measuring under the influence you can do something about it. The simplest thing to do is use a hand tool that has ratchet or friction drives to achieve more consistent gaging pressure. Or, in the case of the micrometer, the best way to obtain the most consistent reading is with an indicating micrometer. This type of micrometer combines the flexibility of range with the high resolution and consistent gaging force of a dial indicator.
The lower anvil of an indicating micrometer is actually the sensitive contact of a built-in indicator which provides readings (it's typically in 1um/50u" gradations) clearly and quickly with no vernier to read. Like the standard micrometer, you can adjust the spindle to the size needed and obtain a consistent gaging force when the master is set to zero on the dial indicator. Once established, the spindle is locked into position. Now the measuring tool begins to act like a gage by making measurements in a comparative mode. A retraction lever is also incorporated in the gage, making it easy to position the part for measurement quickly and to reduce wear on the contacts.
An indicating micrometer is a perfect gage for medium run, high tolerance parts. With this one gage an experienced operator can quickly set up the measurement process. Once the gage is locked in place, the indicating micrometer applies identical gaging pressure for each measurement, regardless of who is using it. The novice quickly obtains the same uniform high accuracy results as the experienced inspector regardless of differences in feel or what is known or not known about the part.
Micromar Micrometers-
Everything rotates around precision
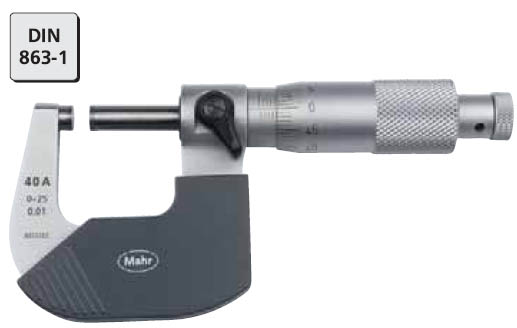
Micrometers together with calipers are the most frequently used hand measurring instruments. Our mechanical micrometers are extremely reliable and easy to read while digital micrometers combine the precsion from Mahr with the most modern electronics. Micromar 40A series of mechanical micrometers provides a number of standard configurations that ensure precise and reliable results are obtained even in the most difficult shop conditions .
 combine the precsion from Mahr with the most modern electronics. Micromar 40A series of mechanical micrometers provides a number of standard configurations that ensure precise and reliable results are obtained even in the most difficult shop conditions .
No comments:
Post a Comment